If you have never heard of kefir, I am about to change your life. It is similar to a yogurt, only thinner and with significantly more health benefits. Kefir contains around 35 major strains of healthy bacteria that do not exist in yogurt. Don't get me wrong, yogurt is still very healthy! But unlike yogurt, kefir’s healthy bacteria, active yeast, and digestive enzymes actually help digest all of the foods you eat. The healthy bacteria not only eats up candida and sugars, it actually colonizes in your gut to help digest your food and kill off future pathogens. It helps keep you regular (not in a bad way!) so I highly doubt you will ever suffer from constipation. Also, if you drink it at night you will not have acid reflux. AND the yeast in the grains feeds on lactose in the milk so many people with lactose intolerance can enjoy it!
I also read about a study where they put harmful bacteria into the kefir and the grains were not contaminated, but completely destroyed it!
I know I post about kefir all the time, but I will never be able to cover all of its health benefits. I am always reading new studies and articles on the amazing qualities of kefir and there are countless stories about people who have cured long term illnesses, allergies, digestive problems, etc.
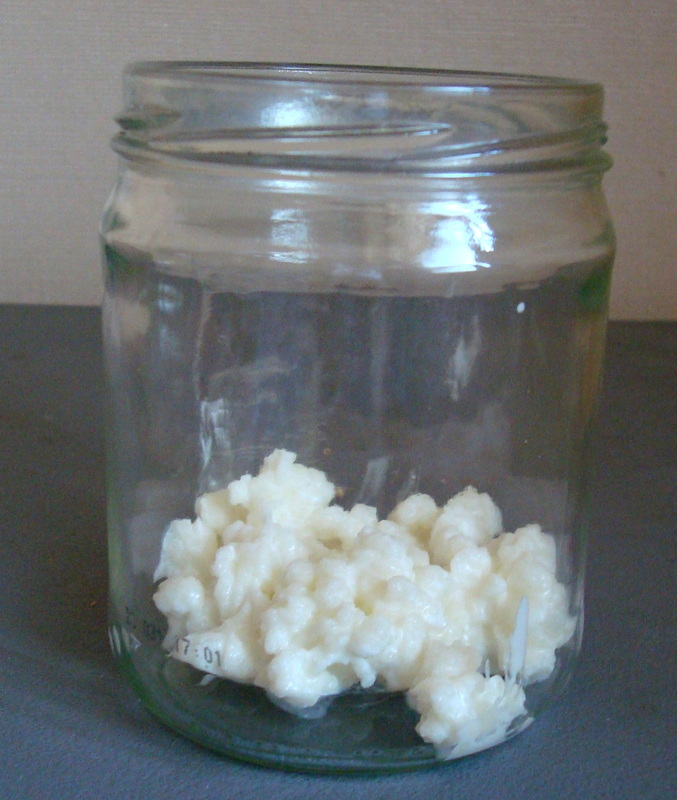
You can buy kefir from the grocery store, but making it at home is really simple, helps you save money, and is also much healthier because it doesn't have additives. To start making it, all you need are some kefir grains (see picture below). They look similar to cauliflower and are a combination of yeasts and bacteria, along with some sugars and proteins.
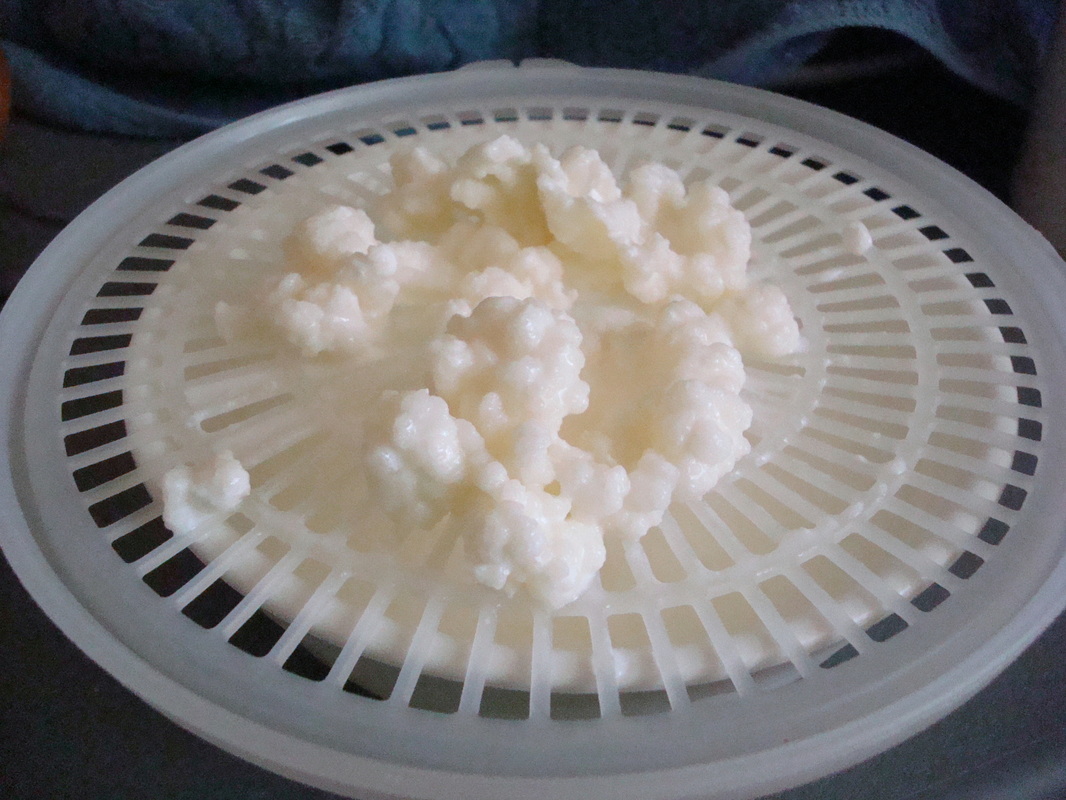
I can send you some or you can order them other places on line. Once you have the grains they will last forever and continue to multiply if you keep feeding them with milk. I am constantly dehydrating my extra grains to save them (instructions below).
Kefir tastes wonderful in smoothies or by itself and can also be replaced for buttermilk in baking.
Instructions:
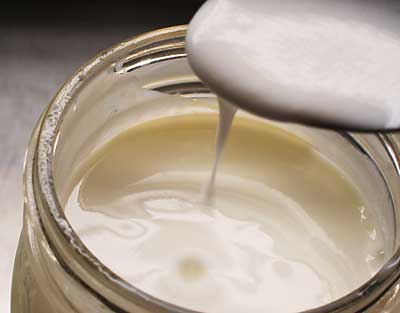
Put kefir grains in a glass jar and pour in a couple cups of fresh milk (preferable raw organic, but you can do it with any milk). Let it sit on the counter with a cloth and rubber band covering it (EDIT: I no longer use a cloth, but instead an airtight lid. This seems to work really well!!) for 12 to 24 hours (depending on temperature and the ratio of grains to milk). Usually I do about 1 Tbls grains per cup of milk. The longer it sits the more cultured and stronger it will get. However, you don't want the curd and whey to separate because then it will start to taste like blue cheese and it will be very thin. It will help if you mix it a few times during the day. When the kefir is ready, strain it and repeat the process. Make sure to only use wood and plastic utensils because metal is supposed to be harmful for the culture. When I do this in California in the summer I usually only let it sit for a day; however if it is a little cooler or if an air conditioner is on, it usually takes a day and a half. It took me some experimentation before I could make the perfect thick creamy kefir that I love!
Kefir grains GROW, so I like to use my extras to culture non-dairy milk. However, kefir grains will not multiply when they are cultured in non-dairy milk. For more instructions, you can read my post: Coconut Milk Kefir.
You can also make Kefir Cheese. This is a creamy cheese that works really well in dips, cheese cakes, and ice creams.
I also read about a study where they put harmful bacteria into the kefir and the grains were not contaminated, but completely destroyed it!
I know I post about kefir all the time, but I will never be able to cover all of its health benefits. I am always reading new studies and articles on the amazing qualities of kefir and there are countless stories about people who have cured long term illnesses, allergies, digestive problems, etc.
You can buy kefir from the grocery store, but making it at home is really simple, helps you save money, and is also much healthier because it doesn't have additives. To start making it, all you need are some kefir grains (see picture below). They look similar to cauliflower and are a combination of yeasts and bacteria, along with some sugars and proteins.
I can send you some or you can order them other places on line. Once you have the grains they will last forever and continue to multiply if you keep feeding them with milk. I am constantly dehydrating my extra grains to save them (instructions below).
Kefir tastes wonderful in smoothies or by itself and can also be replaced for buttermilk in baking.
Instructions:
Put kefir grains in a glass jar and pour in a couple cups of fresh milk (preferable raw organic, but you can do it with any milk). Let it sit on the counter with a cloth and rubber band covering it (EDIT: I no longer use a cloth, but instead an airtight lid. This seems to work really well!!) for 12 to 24 hours (depending on temperature and the ratio of grains to milk). Usually I do about 1 Tbls grains per cup of milk. The longer it sits the more cultured and stronger it will get. However, you don't want the curd and whey to separate because then it will start to taste like blue cheese and it will be very thin. It will help if you mix it a few times during the day. When the kefir is ready, strain it and repeat the process. Make sure to only use wood and plastic utensils because metal is supposed to be harmful for the culture. When I do this in California in the summer I usually only let it sit for a day; however if it is a little cooler or if an air conditioner is on, it usually takes a day and a half. It took me some experimentation before I could make the perfect thick creamy kefir that I love!
Kefir grains GROW, so I like to use my extras to culture non-dairy milk. However, kefir grains will not multiply when they are cultured in non-dairy milk. For more instructions, you can read my post: Coconut Milk Kefir.
You can also make Kefir Cheese. This is a creamy cheese that works really well in dips, cheese cakes, and ice creams.
 Step 1: Put the kefir grains into a glass jar, bowl, or cup. |  Step 2: Poor fresh milk over the grains, cover with a cloth or lid, and leave at room temperature for 12-24 hours (depending on how sour you like it). If you remember, you can stir it or if it has a lid you can shake it during the culturing process to mix the grains in with the milk. This will help to create an even consistency in the kefir. |
Step 3: After the kefir is cultured to your liking, strain out the kefir grains. Use a plastic or mesh strainer because metal is supposed to be bad for the culture.
Storing:
If you need to store the kefir grains, put them in a container covered in some milk and make sure to replace the milk every couple of weeks.
Also, extra kefir grains can be dried or frozen.
Drying Kefir Grains:
When you dry your kefir grains, they shrink a lot! So I would wait until you have a sufficient amount before drying them just in case they don't all come back to life.
Rinse the grains several times with filtered water. Pat with a clean wash cloth or paper towel to get any excess moisture out. Then lay them out on a clean dry towel in a warm area for 1-2 days until they are completely dried out. In Korea we have floor heating so I simply put the towel on the floor and they dry out by the next day. A warm car in the summer would also work well or of course a dehydrator if you have one. Once they are dry, put them in a sealed container (adding some dry milk powder will make them last longer) and keep in the refrigerator.
When you want to use them again (I tested this out after about 2 months of being dried) just treat them like normal kefir grains and replace the milk every 24 hours. The first couple of batches might not be the best, but after a few days the kefir should start to grow again.
Freezing Kefir Grains:
I froze mine in a container with some milk. After 1 1/2 months I thawed them at room temperature and replaced the milk every 24 hours. The first couple of batches weren't great but by the 4th day I had good kefir again.
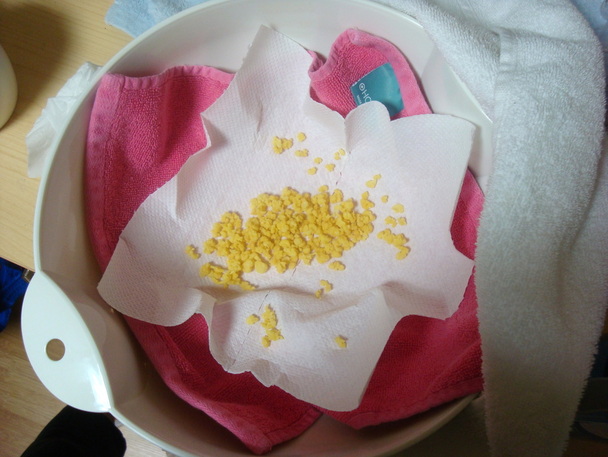
Drying my kefir grains. They will shrink a lot and become yellow.
 RSS Feed
