What you need:
kombucha culture: sometimes called the mother mushroom or scoby which you can obtain through a friend like me (I have plenty because a new scoby forms with every batch!)
1/2 cup starter tea (from a previous batch of kombucha)
6 cups filtered water (not distilled) (48 oz, 1.5 quarts, a little more than 1400 mL)
3 tea bags: you must use a type of black or green tea that does not contain oil (like early grey) these oils will contaminate your scoby. Herbal teas must be combined with black or green tea, they will not work on there own.
1/2 cup sugar (don't worry about the sugar content, the scoby feeds off of the sugar during the fermentation process leaving an insignificant amount when you drink it)
You will also need a big glass jug or bowl, a clean towel, and a rubber band.
Step
1. Wash all utensils with hot water!
2. Making the tea: Boil the water and dissolve 1/2 cup sugar. Continue to boil for 5 minutes.
3. Steep and Cool: Take the sugar water off of the heat and add the tea bags. Let it steep until it cools to room temperature. Or after steeping for 10 minutes, you can add cold filtered water and a little more sugar (about 1 to 2 Tablespoons per cup). You want to make sure the tea is not hot when you add the kombucha.
4. Combine with culture: Strain and poor cooled sweat tea into a glass jar or bowl with the kombucha culture and about a 1/2 cup of starter tea from the previous batch. If you don't have left over kombucha tea, you may use 1/4 to 1/2 cup of white organic distilled vinegar as a substitute starter for your first batch. It is important for there to be enough starter tea, otherwise unwanted bacteria could grow. So if you are making a bigger batch, use more starter.
5. Ferment: Cover tightly with a cloth and rubber band so that bugs can't get in. The kombucha needs air as it ferments so do not seal the jar!
Let sit for 5 to 14 days in a undisturbed area (65 to 90 degrees F) out of direct sunlight. You can begin testing it by sticking a straw in the side and sipping it. The finished tea should have a slight vinegar smell, not to strong, and have a little carbonation. If your tea still smells sweet and/or is flat, then most likely it needs to ferment a few more days. After 5 to 10 days, the taste should be fizzy, semi-sweet, and similar to apple cider in appearance. Allowing it to brew longer (8-10 days) produces a sharper vinegar taste and contains a higher amount of beneficial medicinal properties.
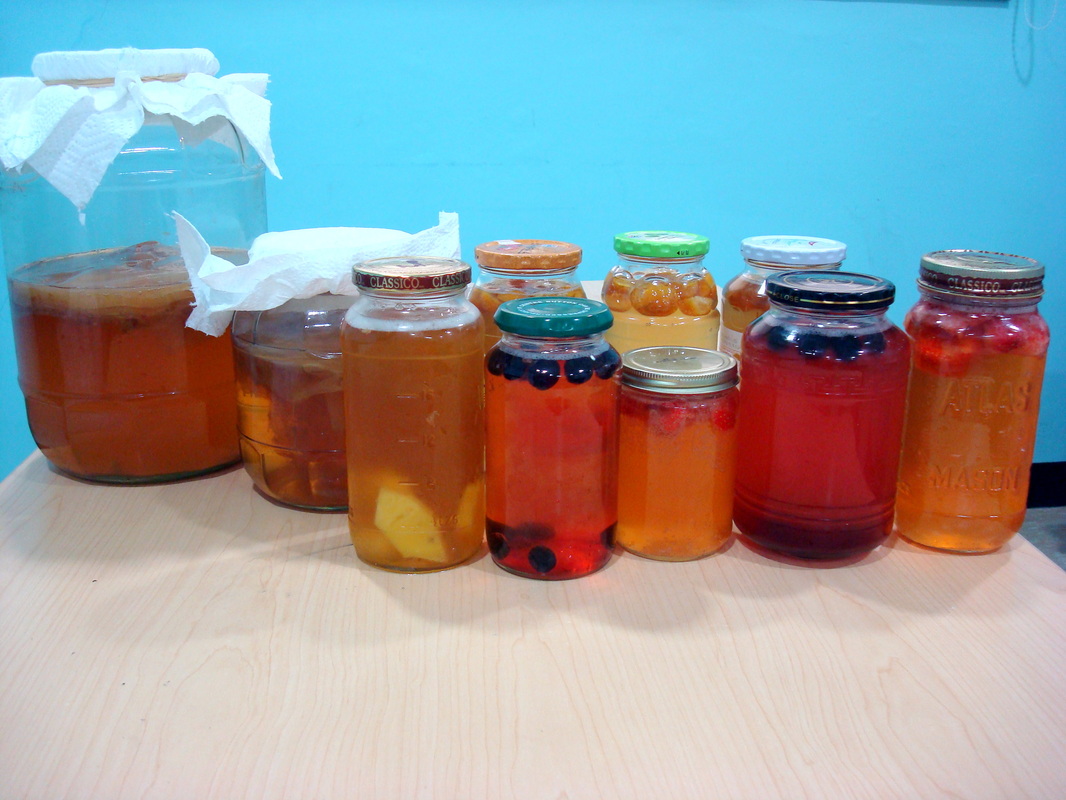
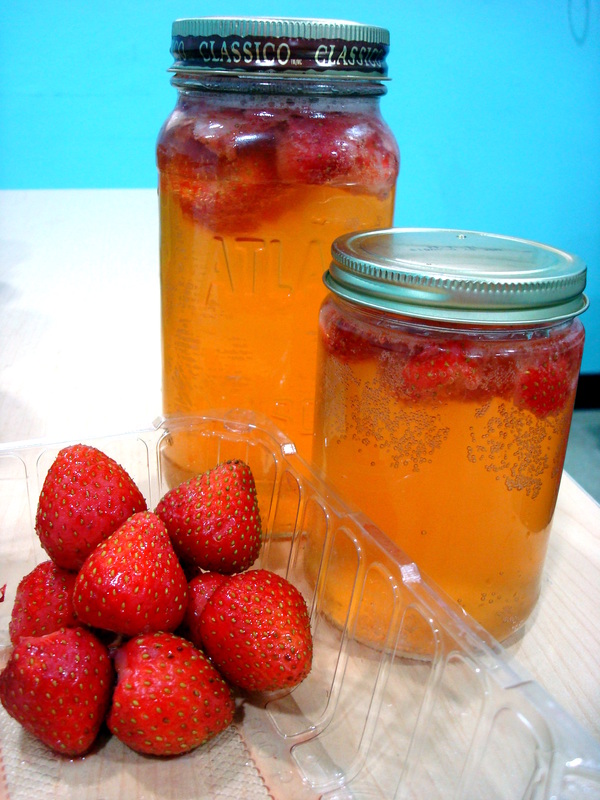
6. Enjoy: Now that the brewing cycle is complete, you can drink as is, bottle into clean glass jars, or mix with other teas, herbs, and juices.
To start a new batch, just follow the above instructions remembering to save some starter tea for the next batch.
kombucha culture: sometimes called the mother mushroom or scoby which you can obtain through a friend like me (I have plenty because a new scoby forms with every batch!)
1/2 cup starter tea (from a previous batch of kombucha)
6 cups filtered water (not distilled) (48 oz, 1.5 quarts, a little more than 1400 mL)
3 tea bags: you must use a type of black or green tea that does not contain oil (like early grey) these oils will contaminate your scoby. Herbal teas must be combined with black or green tea, they will not work on there own.
1/2 cup sugar (don't worry about the sugar content, the scoby feeds off of the sugar during the fermentation process leaving an insignificant amount when you drink it)
You will also need a big glass jug or bowl, a clean towel, and a rubber band.
Step
1. Wash all utensils with hot water!
2. Making the tea: Boil the water and dissolve 1/2 cup sugar. Continue to boil for 5 minutes.
3. Steep and Cool: Take the sugar water off of the heat and add the tea bags. Let it steep until it cools to room temperature. Or after steeping for 10 minutes, you can add cold filtered water and a little more sugar (about 1 to 2 Tablespoons per cup). You want to make sure the tea is not hot when you add the kombucha.
4. Combine with culture: Strain and poor cooled sweat tea into a glass jar or bowl with the kombucha culture and about a 1/2 cup of starter tea from the previous batch. If you don't have left over kombucha tea, you may use 1/4 to 1/2 cup of white organic distilled vinegar as a substitute starter for your first batch. It is important for there to be enough starter tea, otherwise unwanted bacteria could grow. So if you are making a bigger batch, use more starter.
5. Ferment: Cover tightly with a cloth and rubber band so that bugs can't get in. The kombucha needs air as it ferments so do not seal the jar!
Let sit for 5 to 14 days in a undisturbed area (65 to 90 degrees F) out of direct sunlight. You can begin testing it by sticking a straw in the side and sipping it. The finished tea should have a slight vinegar smell, not to strong, and have a little carbonation. If your tea still smells sweet and/or is flat, then most likely it needs to ferment a few more days. After 5 to 10 days, the taste should be fizzy, semi-sweet, and similar to apple cider in appearance. Allowing it to brew longer (8-10 days) produces a sharper vinegar taste and contains a higher amount of beneficial medicinal properties.
6. Enjoy: Now that the brewing cycle is complete, you can drink as is, bottle into clean glass jars, or mix with other teas, herbs, and juices.
To start a new batch, just follow the above instructions remembering to save some starter tea for the next batch.


 RSS Feed
